How to Run ILUM Data Lakehouse on Google Cloud in Under 30 Minutes
Learn how to deploy the Ilum Data Platform on Google Cloud for development and experimentation and see how to go from a fast data lakehouse setup to production-ready data pipelines. Prefer a guided path? Level up with the Ilum Course at IlumCourse.com.
Why Ilum as Your Data Lakehouse Platform
Ilum is a Kubernetes-native data platform that lets teams stand up a modern data lakehouse in minutes, not months. You get:
- Apache Spark as primary compute (with optional Trino for SQL),
- Built-in SQL editor & notebooks, full Jupyter integration,
- Orchestration & operations for Spark jobs and “virtual clusters”
- Lineage & versioning (table diffs, ERD & column-level lineage),
- Integrated OSS: Airflow, Superset (BI), MLflow, Gitea, and more.
This guide shows a lean, single-VM setup on Google Cloud, perfect for learning, POCs, and sandboxing your lakehouse workflows.
Who This Guide Is For
- Developers & Data Engineers evaluating a modern data platform on Google Cloud
- Analysts wanting quick SQL + dashboarding on a data lakehouse
- Teams needing a repeatable dev environment before hardening to production
What You’ll Build
A single-VM Ilum data platform on Google Cloud that runs a development-grade data lakehouse:
- Launch Kubernetes, Helm, and Ilum via a startup script
- Run Spark jobs, SQL queries, and create Superset dashboards
- Explore built-in data lineage and table versioning
Your Fast Track to a Google Cloud Data Lakehouse with Ilum
Setting up a new data platform can feel overwhelming: Too many tools, too many options. Ilum changes that. In this quick-start guide, you’ll get Ilum running on Google Cloud in under 30 minutes – a perfect setup for starting to explore Ilum.
This guide is perfect for developers, data engineers, and analysts who want to understand Ilum’s workflow in a hands-on way, but might not want or be able to install Ilum on their local machine. By the end, you will be ready to experiment with real data microservices, Spark jobs, and dashboards – just like in the official Ilum Course.
Step 1: Log into Google Cloud
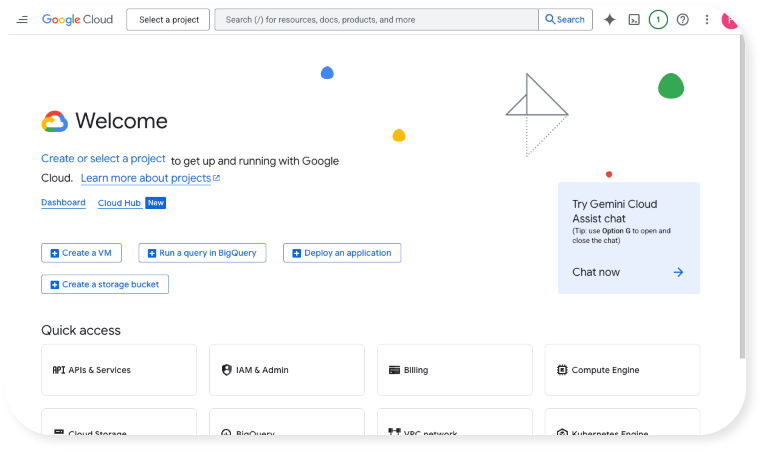
First, sign in to the Google Cloud Console. If you don’t yet have an account, create one. You’ll get a free trial and can start experimenting right away.
Here is what you should see once you have logged in:
Step 2: Create a new Project
For billing and project structuring purposes, we will create a new project to run the VM (Virtual Machine) in. Here is how to create a project:
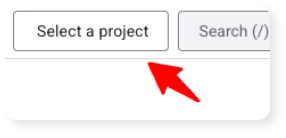
a. Click on "Select a project":
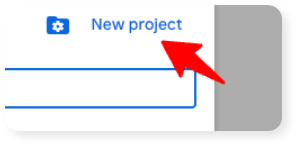
b. Then, click on "New project" on the top right:
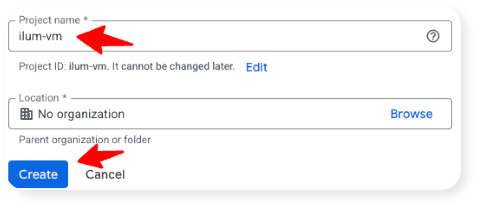
c. Enter "ilum-vm" as a project name. You can leave the organization unassigned, then click "Create":
Step 3: Set up Billing (Don’t Worry, it’s minimal!)
For experimenting with Ilum, we’ll run its setup on a single virtual machine (VM). Expect costs around $0.10-$0.40 per hour, depending on your configuration. You will have to pay for the virtual machine and the associated disk space you use for your Ilum installation – unless you receive the free trial. For this, we need to set up billing.
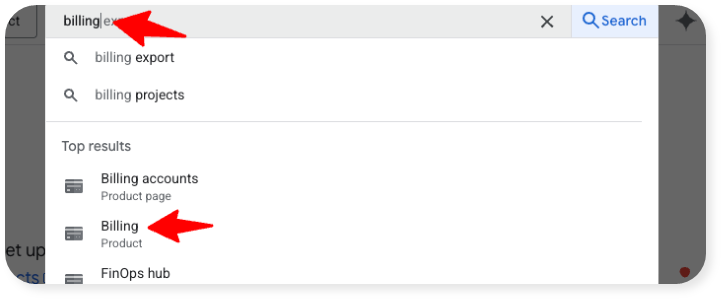
- Click on the search bar on the top and search for "billing". Once the "Billing" product appears, click it.
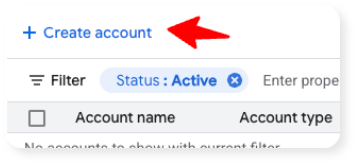
- Click on "Create account":
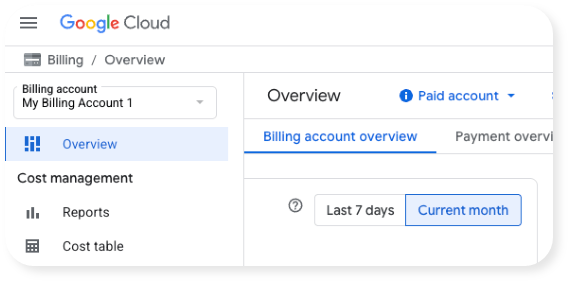
- Now, follow all instructions and add a payment method until you see the newly created billing account Overview:
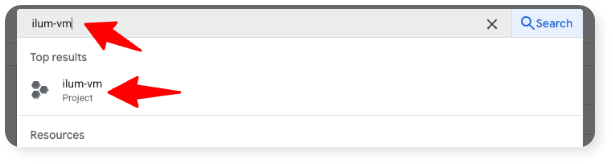
- Next, we need to assign our "ilum-vm" project to this billing account. Search for the project in the search bar and click it:
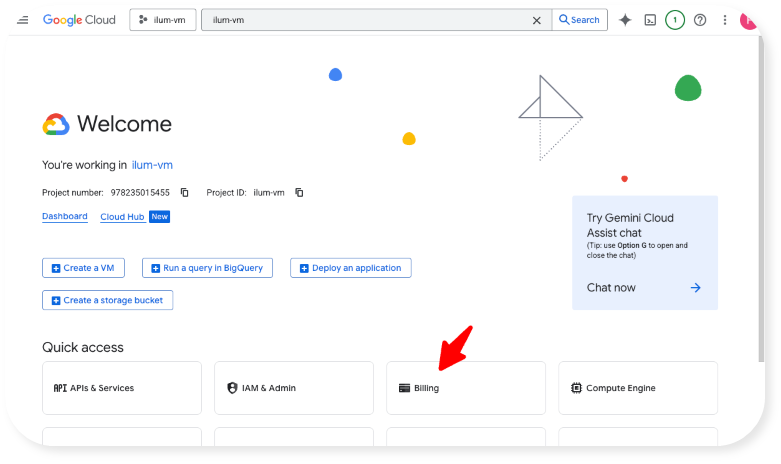
- Click on "Billing" in the "Quick access" area:
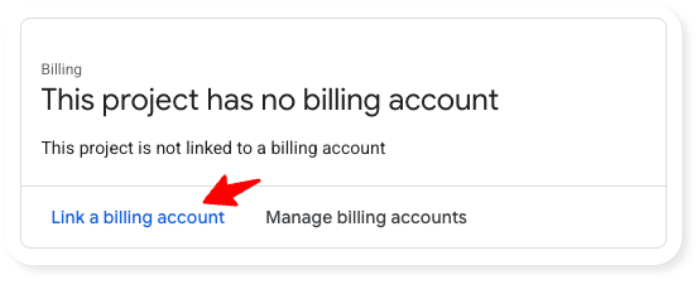
- Click on "Link a billing account":
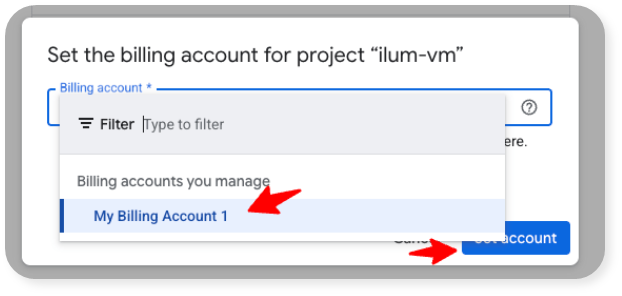
- Select the billing account you created in step 3 above and the click on "Set account":
Perfect, we are done setting up the billing for our new project!
Step 4: Enable the Compute API
In order to create a virtual machine (in Google Cloud called "compute"), we need to give it permission to do this. This is done via enabling the Compute API. Here is how that works:
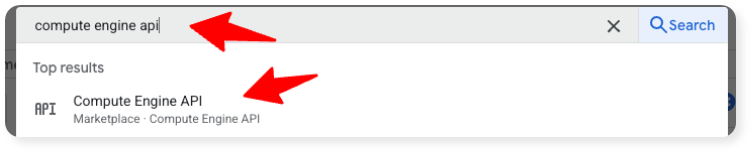
- Search for "Compute Engine API" in the search bar and click on it:
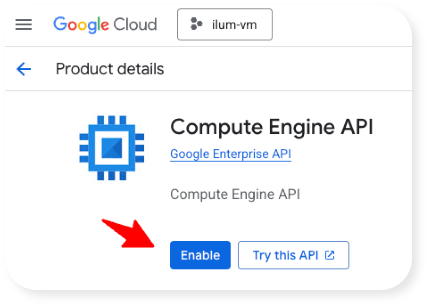
- Click on "Enable":
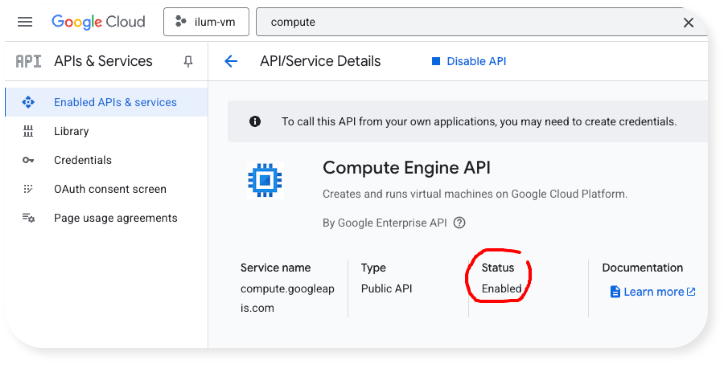
Enabling may take a minute or two. Here is how things should look like after the API has been enabled. Note the "Status: Enabled" statement:
Step 5: Install the Google Cloud CLI
Setting up the virtual machine to run Ilum us much easier using the Google Cloud command line interface (CLI). Install it as described in the Google documentation. Make sure to run gcloud init to authenticate with your Google account.
On work computers, a lack of admin rights might mean you are unable to install the Google Cloud CLI. You can still install Ilum on Google Cloud and use it in the course. Scroll further down in this article to find an instruction for an alternative installation route that is slightly more cumbersome than using the CLI, but works without local installation.
Step 6: Launch the Virtual Machine
With all preparations taken, let's start the virtual machine and install Ilum!
Download the startup script:
Click here to download the script
The startup script is what we will use to automatically initialize the virtual machine. It will install Kubernetes, Helm, and Ilum – steps you could also take manually (but that would take you more time).
Instruct the Google Cloud CLI to create the machine
Paste the VM creation command below into a terminal/command line on your computer.
Make sure to run the terminal from the same directory where you have downloaded the startup script to or point the command below to the absolute path of the start_vm.sh script (line 13).
You can also adjust the ZONE to fit a zone close to you. Here, europe-north2-a was selected for its low price and sustainable footprint.
PROJECT_ID=ilum-vm
ZONE=europe-north2-a

gcloud config set project $PROJECT_ID
gcloud compute instances create ilum-dev-node \
  --zone $ZONE \
  --machine-type e2-custom-12-18432 \
  --provisioning-model=SPOT \
  --instance-termination-action=STOP \
  --maintenance-policy=TERMINATE \
  --network-interface=subnet=default,network-tier=STANDARD \
  --image-family ubuntu-2204-lts --image-project ubuntu-os-cloud \
  --boot-disk-type=pd-balanced --boot-disk-size=100GB \
  --metadata-from-file startup-script=start_vm.sh
Once you have made all necessary adjustments, execute the code. Now, the machine should start up. This step installs Kubernetes, Helm, and Ilum so you can explore a development-grade data lakehouse on a single VM.
Note: Above, we have chosen a preemptible machine. This helps keep cost at ca. 1/4 of a non-preemptible machine but has an important disadvantage: When Google Cloud needs the compute for other clients, your virtual machine will be shut down. If you are willing to spend more on your virtual machine for the benefit of avoiding random shutdowns, then remove lines 7, 8, and 9 from the command above before creating the machine.
Monitor the startup process
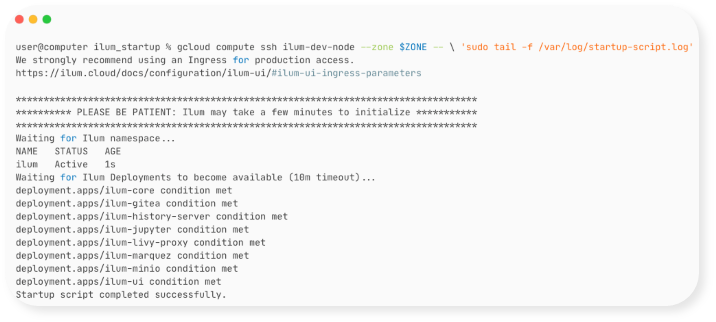
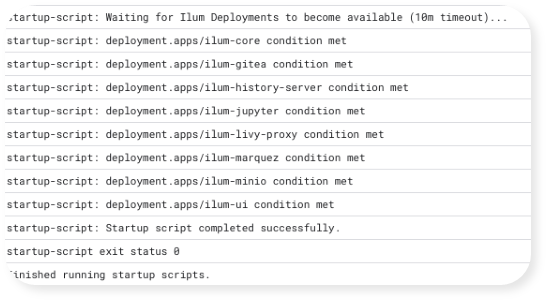
After 5-10 seconds, execute the following code to watch what is happening inside the virtual machine:
gcloud compute ssh ilum-dev-node --zone $ZONE – \ 'sudo tail -f /var/log/startup-script.log'Wait until "Startup script completed successfully." appears, this may take a couple of minutes:
Step 7: Access the Ilum UI
We're ready to explore Ilum! Run the following command to forward the port of the Ilum UI on the remote virtual machine to your own computer:
gcloud compute ssh ilum-dev-node --zone=$ZONE – -L 31777:localhost:31777Now, open http://localhost:31777 in your browser to access Ilum. Access works as long as the above command is running.
To log in to your new Ilum installation, use the username "admin" and the password "admin". Welcome to your new Ilum installation:
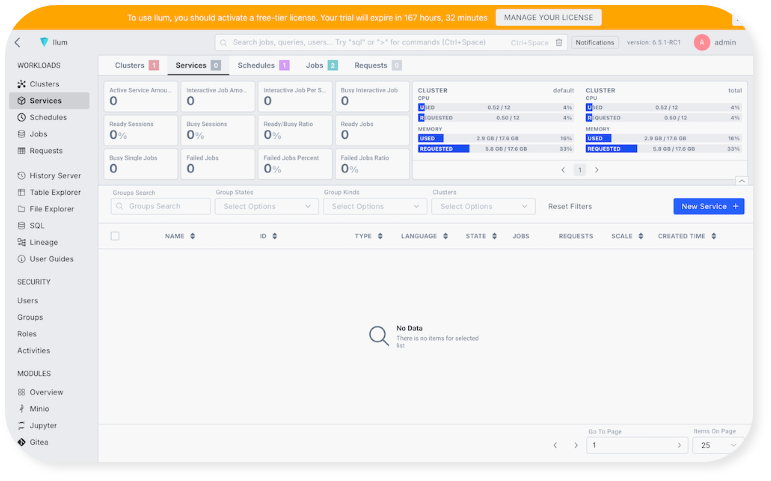
Think of the Ilum UI as the control plane of your data platform, run Spark jobs, write SQL, check data lineage and build dashboards.
Important: This is strictly an installation for development (and course taking!) purposes – it lacks proper load balancing, security, and resilience to be used in a production environment.
Step 8: Manage the Virtual Machine
As long as the virtual machine is running and as long as disk space is reserved for the machine, it will cause cost. You can learn more about this cost here.
Shutting down
When you are not using the machine, e.g. when you have finished your learning session, shut down your machine like this:
gcloud compute instances stop ilum-dev-node --zone=$ZONERestarting
To restart the machine, use this command:
gcloud compute instances start ilum-dev-node --zone=$ZONEWhen you have restarted the machine, it will take some minutes until Ilum is up and running again. You can check the status of Ilum's Kubernetes pods with the following command once you have connected to the virtual machine as shown in the last step:
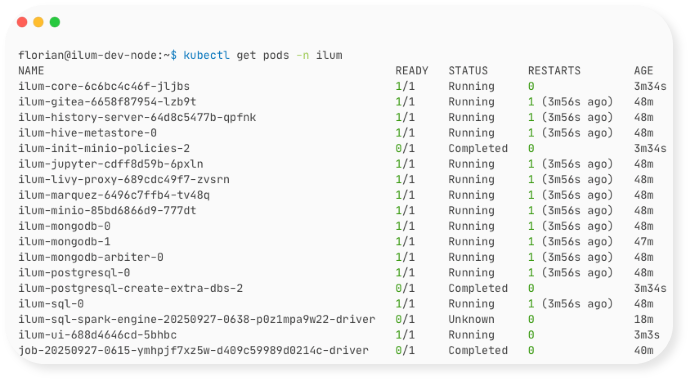
kubectl get pods -n ilumIlum is ready to connect once all of its core containers are running again:
Removing
To completely remove the machine, incl. the attached storage, and stop it from causing any cost, use this command:
gcloud compute instances delete ilum-dev-node --zone "$ZONE" --delete-disks=allAlternative Route Without Google Cloud CLI
If you cannot install the Google Cloud CLI on your machine as described above, then the setup of a virtual machine to run Ilum is slightly more involved. Follow the instructions below. This assumes that you have followed the tutorial above until and including "Step 4: Enable the Compute API".
Set up a Firewall Rule
Considering you intend to use the virtual machine for development purposes only, will not upload sensitive data, and Ilum has its own authentication system, the easiest and most practical way to expose Ilum for you to work with it is via opening a port in the firewall of the virtual machine.
We will only open this port to your own IP – decreasing the risk of unintended access by a third party. However, if you are on a company network, many devices might share the same IP which means your colleagues might be able to access the Ilum instance and log in if they know the IP of the instance and have Ilum's access credentials (the standard is "admin" as username and "admin" as password).
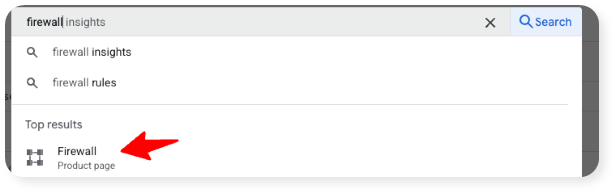
- Search for "firewall" in the search bar and click on it:
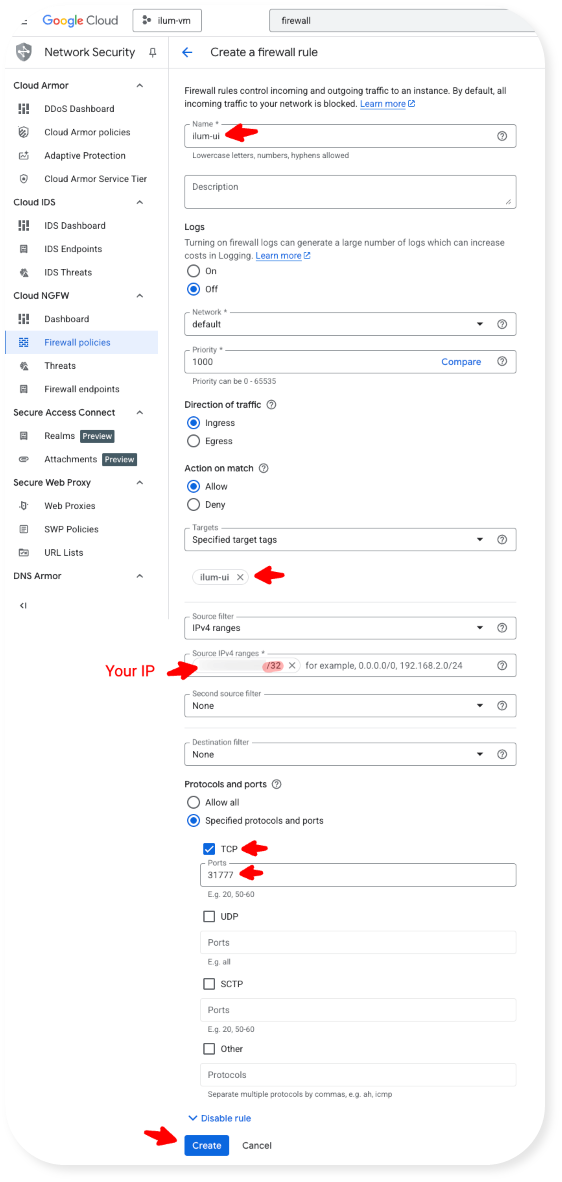
- Click on "Create firewall rule":

- Configure the following settings. Make sure to enter your IP, followed by "/32". You can find out your IP via websites like ipinfo.io.
Configure and Launch the Virtual Machine
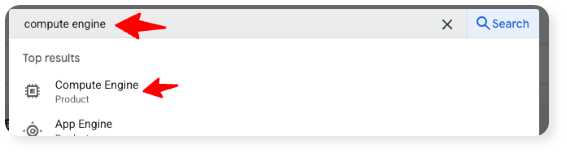
- Search for "compute engine" (not "compute engine api" as before) in the search bar and click on it:
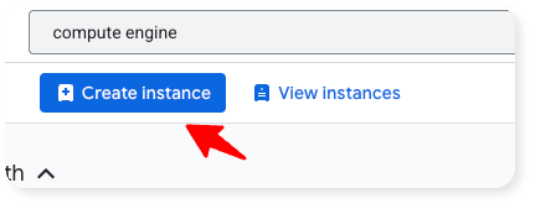
- Click on "Create instance":
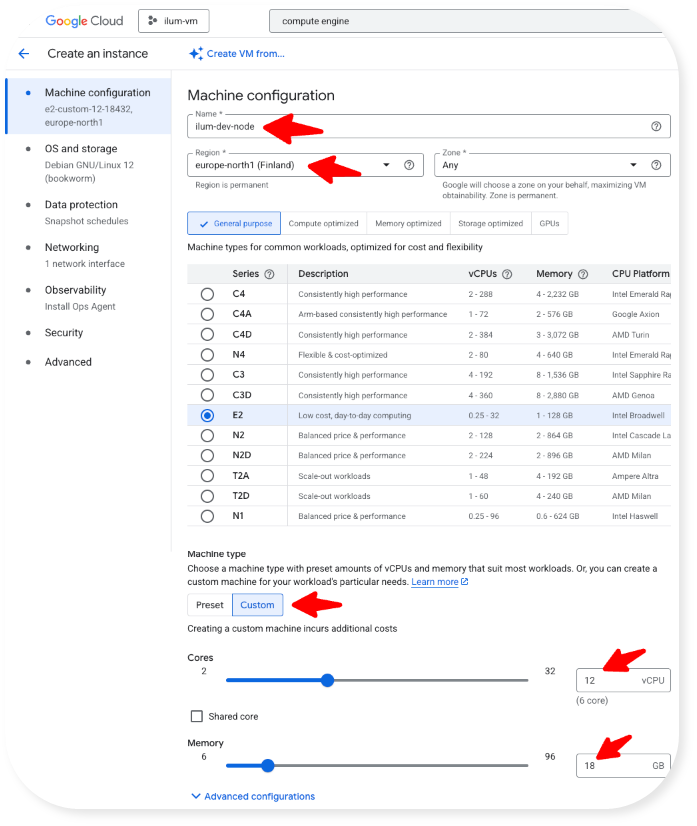
- In the Machine Configuration tab, make the following settings:
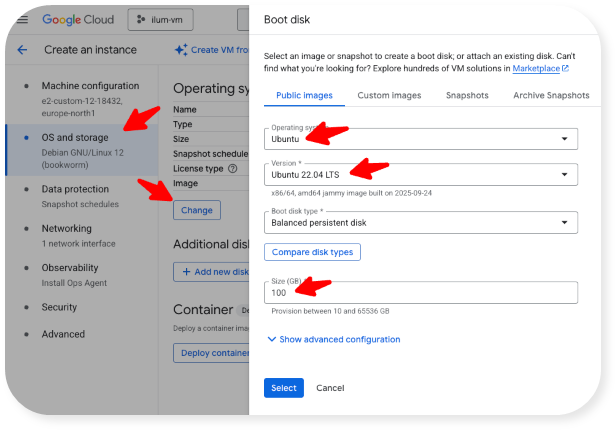
- Under OS and Storage, set up the virtual machine like this:
- In the "Data Protection" tab, select "No backups" (this will save cost).
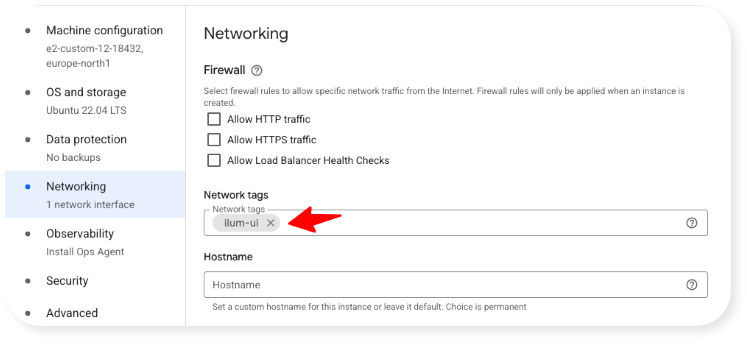
- In the "Networking" tab, add the "ilum-ui" tag:
- Under "Observability", disable "Install Ops agent for Monitoring and Logging" (this will save cost).
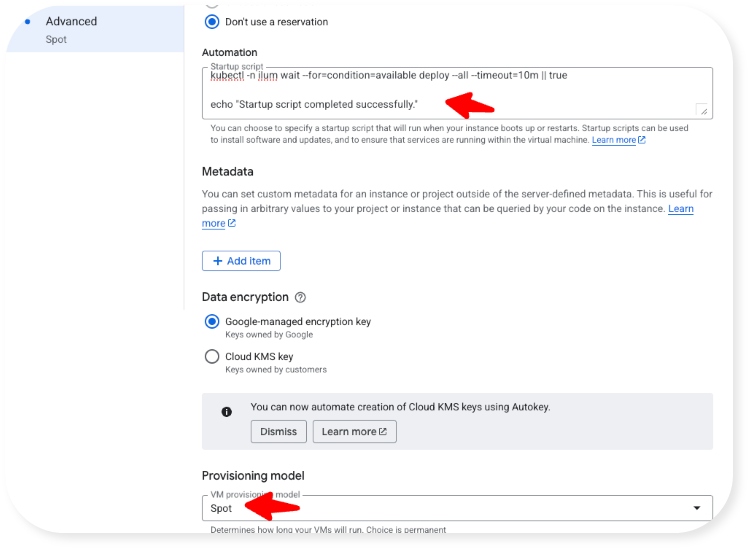
- In the "Advanced" tab: Download the startup script below, open it in a text editor, and copy and paste its contents into the "Startup script" field. Then, select "Spot" as VM provisioning model (optional, read more about this in Step 2 under "Step 6: Launch the Virtual Machine" above):
Click here to download the script
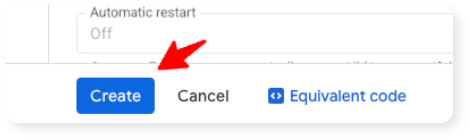
- Then, finally, click on "Create" to create the virtual machine:
- Startup, incl. starting Ilum, will take a couple of minutes. You can monitor the status of the Ilum initialization via the logs:
Once you see "Startup script completed successfully", Ilum is ready to use. (To see live logs, you might have to click on the "stream logs" button on the top right.)
Connect to Ilum
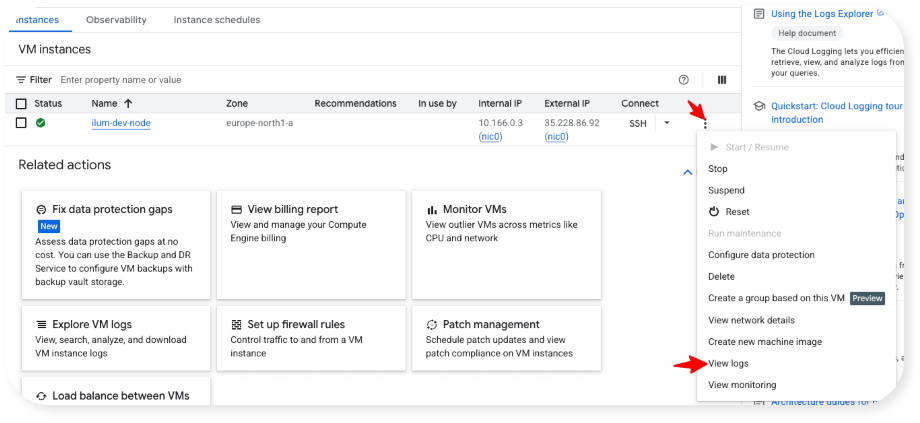
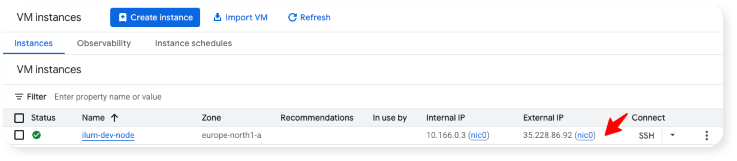
To connect to Ilum, copy the External IP of the virtual machine into your browser bar (you can find it in Google Cloud in the list of VM instances, see below) and append ":31777" to it.
When you connect to this URL, you should see the Ilum login screen:
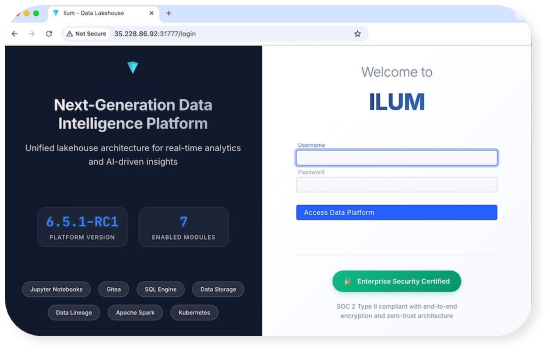
Login with Ilum's out-of-the-box credentials to get started (Username: admin, Password: admin).
Manage the Virtual Machine
As long as the virtual machine is running and as long as disk space is reserved for the machine, it will cause cost. You can learn more about this cost here.
It is recommended to stop the machine when you are not using Ilum. This will bring cost down significantly, as you will only be paying for persistent storage but not for CPUs and RAM. After having stopped the machine, you can resume it when you are experimenting with Ilum again.
Once you are completely done experimenting with Ilum, delete the machine incl. its attached storage – after this, you will not incur any cost.
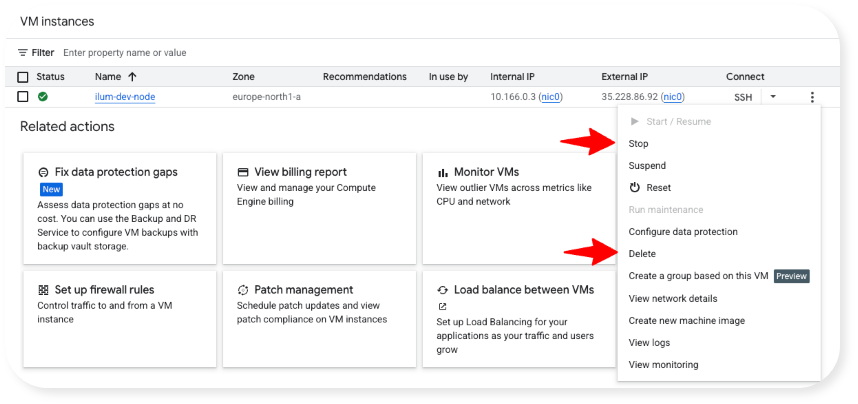
All machine management options are available in the menu available via the 3 dots in the far right of the machine table:
Congratulations! You now have Ilum up and running on Google Cloud and are ready to experiment, build, and explore. But if you want to rapidly go from “it works” to production-ready pipelines, Spark microservices, and live dashboards, then the official Ilum Course is your fast track. In just a few hours you’ll build real, deployable components (SQL, Spark jobs, Superset dashboards) and get hands-on guidance from the instructor and the Ilum team.
Join now!
Enroll in the Ilum Course →
From Dev to Production: Hardening Your Data Lakehouse
This single-VM setup is for development only. To run Ilum as a production-grade data platform on Google Cloud, plan to:
- Deploy on a managed Kubernetes cluster (e.g., GKE) with multi-node resilience
- Add load balancing, TLS/HTTPS, and OIDC/SSO
- Configure backup/restore, autoscaling, and observability
- Separate compute and storage; use object storage for data durability
- Set up access control and network policies
Keep Building with Ilum
- Architecture Overview → https://ilum.cloud/docs/architecture/
- Use Cases (e.g., Transactions) → https://ilum.cloud/docs/use_cases/transaction/
- Docs Home → https://ilum.cloud/docs/
- Ilum Course → https://IlumCourse.com